The Weekend Upgrade: Installing Sun Tubes in Just a Few Hours
Imagine transforming your home with natural light in the time it takes to binge-watch a TV series. Unlike other home improvement projects that can drag on for weeks, installing sun tubes is a fast, cost-effective upgrade that fits into your weekend plans. With minimal disruption and maximum impact, sun tubes are perfect for Wellington homeowners looking for a quick and hassle-free way to brighten their spaces.
In this article, we’ll walk you through why sun tube installations are so simple, what to expect, and how this upgrade can completely change your home in just a few hours.
1. Why Sun Tubes Are the Ultimate Quick Upgrade
Home renovations can be daunting, but sun tubes offer an entirely different experience. Here’s why they’re a homeowner’s dream:
a) Minimal Time Commitment
- Most installations take only 2–3 hours, making it easy to fit into a single day.
- No need to book long absences from work or deal with drawn-out projects.
b) Simple Installation Process
- Unlike skylights, sun tubes require minimal structural changes.
- Installers work efficiently with little mess or disruption.
c) Immediate Impact
- The difference is noticeable as soon as the installation is complete, instantly transforming dark, dim spaces into light-filled areas.
Fact:
Sun tube installations can be completed in one-third the time it takes to install a skylight, making them a convenient weekend project.
2. What to Expect During Installation
The process of installing a sun tube is straightforward and stress-free. Here’s a step-by-step breakdown:
Step 1: Site Assessment
- An installer evaluates your roof type and the area where the sun tube will be placed.
- They identify the best angle and location to maximise light capture.
Step 2: Roof Dome Installation
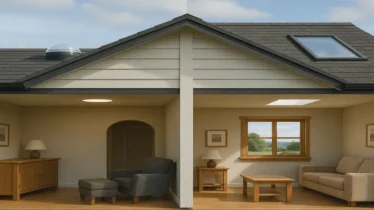
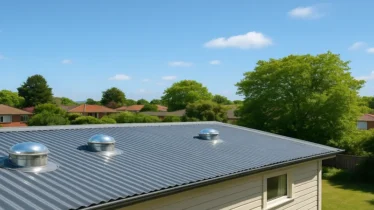
- A small opening is made in your roof to install the dome that captures sunlight.
- The dome is securely sealed to ensure it’s weatherproof and leak-resistant, perfect for Wellington’s variable climate.
Step 3: Reflective Tube Installation
- A highly reflective tube is fitted from the roof to the ceiling, directing sunlight into your space.
- The tube is adjustable to work around attic structures or obstacles.
Step 4: Ceiling Diffuser Installation
- A sleek, low-profile diffuser is installed in your ceiling to distribute natural light evenly.
- The diffuser blends seamlessly with your interior, maintaining your home’s aesthetic.
Step 5: Final Touches
- The installer checks for leaks, secures all components, and ensures the system is functioning correctly.
- Cleanup is quick and easy, leaving your home ready to enjoy immediately.
3. Transforming Your Home in a Weekend
Here are the kinds of spaces you can transform with sun tubes in just one weekend:
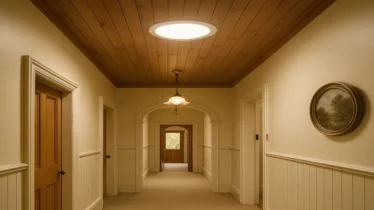
a) Hallways
- Add light to long, dim corridors, creating a brighter and more welcoming path.
b) Bathrooms
- Achieve the luxury of natural light in windowless bathrooms without compromising privacy.
c) Kitchens
- Make your kitchen the heart of your home with warm, natural light that enhances its functionality and ambiance.
d) Home Offices
- Improve productivity and focus with soft, natural light that reduces eye strain.
Example:
A homeowner in Wellington installed two sun tubes in their hallway and bathroom in a single afternoon. “It was the easiest home improvement project we’ve ever done,” they said. “The difference it made was immediate!”
4. Benefits of Quick Sun Tube Installation
Sun tube installations are more than just fast—they’re also practical and cost-effective. Here’s why they’re worth considering:
a) Affordable Home Upgrade
- With quick installation times, labour costs are lower than other lighting solutions like skylights.
b) Minimal Disruption
- There’s no need for major construction or extended work.
- You can go about your weekend while the installers work.
c) Ideal for Wellington Weather
- Short installation times mean less exposure to unpredictable weather, reducing risks during the process.
d) Instant Gratification
- Once installed, the transformation is immediate—you’ll see and feel the difference right away.
Fact:
A professionally installed sun tube can begin transforming your home in less than 3 hours, making it one of the fastest home upgrades available.
5. How to Prepare for Installation
To make the process even smoother, follow these simple steps to prepare for your sun tube installation:
a) Clear the Area
- Move furniture or fragile items from the installation zone to give the installer space to work.
b) Discuss Placement
- Talk to your installer beforehand to ensure the sun tube placement aligns with your lighting goals.
c) Plan Around the Weather
- Choose a sunny or dry day for installation to minimise potential weather-related delays.
6. Call-to-Action
Why wait weeks for natural light when you can have it in just a few hours? Upgrade your Wellington home with sun tubes this weekend and enjoy brighter, more inviting spaces immediately. Contact us today to schedule your installation with trusted local professionals.


